Ask the Experts / [Tutorial]
-
 29-July 10
-
 Cornshot
Offline
Night Shots Tutorial
Cornshot
Offline
Night Shots Tutorial
In this tutorial, I will be explaining how to make night shots in RCT1 and 2 using Photoshop. I will be using a step by step process to explain how to make a screen like this: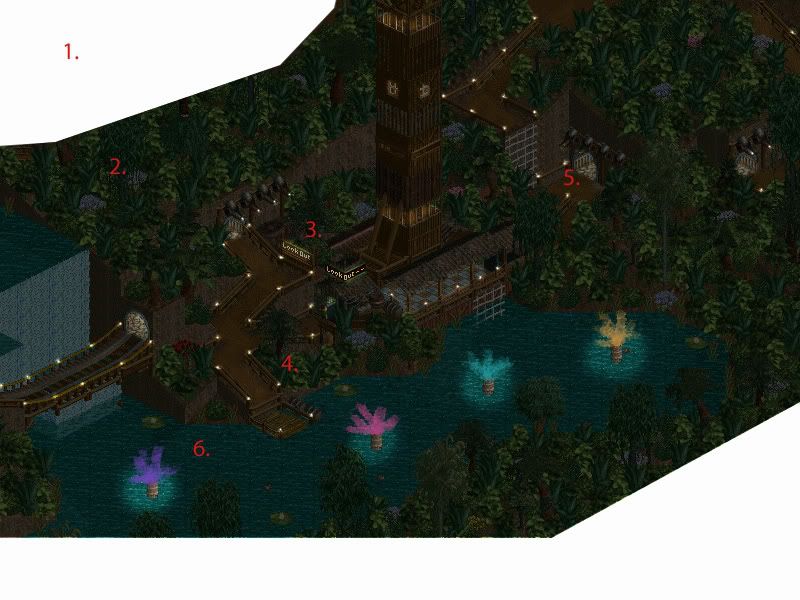
(This was done using Photoshop 6.0 but you should be able to do most of this stuff in any version)
Part 1: Making Of
1. Starting out: The very first thing you need to do is change your picture into JPEG format. You can do this by opening your picture in paint, clicking save as, then beneath the name there is a box that will most likely have the words: 256 colour bitmap. Click on the box then look for the box that says JPEG in the beginning. Click it, then press save. The reason you have to do this is because Photoshop cannot create new layers on pictures in PNG, or BMP format for some reason.
You will probably want to crop your picture to remove the RCT2 border stuff. The way I like to accomplish this is to use the select tool to only select the area you like, then drag it over to the top left hand corner. You can then drag the arrow on the bottom right corner to make the entire picture smaller and get rid of all of the extra junk. Just drag it until the box is only around the part of the picture you want.
If you want to make an irregular shaped crop you will need to open up your picture in photoshop, make a new layer (which we will call layer 4) then use white paint to white out the area you don't want. To make straight line crops you need to use the polygonal lasso tool to select the area you want cropped then colour it in with white paint (you cant paint outside of the area you selected until you click on the screen with any type of lasso again).
2. Creating Night: The first thing you will want to do after loading up your picture in Photoshop (in JPEG format) and cropping it to the size you like will be creating the the night cover.
You can accomplish this by creating a new layer (which I will name layer 1), setting the colour to black, then setting the opacity to around 70 depending on how dark you want it, before colouring the entire layer in using the paint bucket tool.
3. Basic Lighting: Next, it is best to illuminate any in-game objects that you want illuminated such as signs.
To illuminate everything in this tutorial, we will be using the method of setting the eraser brush stroke to a soft stroke, setting the opacity to around 80 depending on how light you want it to be, then erasing layer 1 in the locations you want illuminated. We will be referring back to this section constantly.
4. Lights: Next, you will probably want to illuminate the pathways some how, you can place the in-game lamp objects along the pathways using the method in step 3, create lights on the fences using Photoshop, or any other way you can think of illuminating your park.
If you are creating your own lights, first make a new layer (which we will name layer 2) and place a small white dot in each spot where you want a light. Then, erase the dark layer using the soft brush in a very small area around the light.
5. Lighting up Buildings: Next you will probably want to illuminate your indoor structures, just use the same method as step 3 (with probably a lower opacity) to erase layer 1 near the windows and any other place where you can see the inside of the structure.
6. Pyrotechnics: If you want to make a fireworks display there are methods for each type. Most methods are done on layer 2 with the chalk brush. I will go into further depth into the various lights, pyrotechnics, neon, and other objects you can place in layer 2 in Part 3.
Part 2: Layers
For those of you who are confused by the layers, there are three basic, layers (You can add more if need be)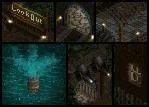
Background: This layer consists of your original screenshot. You can see it through the translucent layer 1 and can easily see it in the spots where you erase layer 1. If you want to actually edit the background you will need to change it into a layer.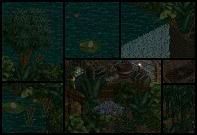
Layer 1: This layer is used to make the actual darkness. You can erase it to make that area appear illuminated.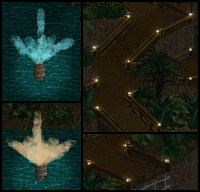
Layer 2: This layer is for the bonus lights, pyrotechnics, neon, ect. Basically, anything you want to be a light source.
Other: You can create more layers when needed. Normally I create a new layer at the very end to crop out the parts I don't want (See Part 1, step 1) I also sometimes make a new layer for weather effects.
Part 3: Pyrotechnics
Pyrotechnics are things such as fireworks used to really spruce up your screen. There are many different types of fireworks and I will attempt to explain how to make them. Most if not all of these are drawn in layer 2. Make sure to have your fireworks come from a base.
Fountains: Use the chalk brush on layer 2 to make a fountain shape in the location you want the fountain to be. Make sure to use bright colours and remember to illuminate the ground beneath it.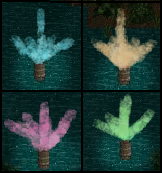
Peony: There are several methods of creating the most commonly used firework. The easiest way is to just use the splatter brush stroke.
Spider: Draw several arches with the chalk brush extending out from the center.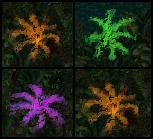
Part 4: Neon and Lasers
Making neon and lasers are probably the simplest things to do. Keep in mind that they look much better when the screen is really dark.
Neon: On layer 2 using the pen tool (If you don't have the pen tool, try using Paint. It has a straight line tool or use the straight line tool. Find it by pressing "U" until it shows up) draw a straight line across the area you want to be neon. Use bright neon colours. If you want, you can also illuminate the light slightly (See Part 1, step 3) or use coloured light (See Part 5)
Lasers: Lasers are made mostly the same way as neon. Draw a straight line in layer 2 from the laser base in the direction you want. Normally, you wont want to illuminate it though. Remember to use bright colours.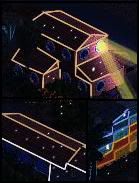
(Picture courtesy of Mike Folf)
Part 5: Coloured Light
Remember to be creative. There is a lot more you can do then just making it night when you are editing your screenshots.
Check out this site for more ideas.
http://members.cox.net/skyman/
I will post more of the tutorial soon
I thought I would post this here in case anyone was having trouble editing their photo's
(Oops, I forgot to finish typing the title) -
 Maverick
Offline
Instead of changing to jpg, instead when you open the screen bitmap change the mode to RGB from Index. You can also use the paintbucket tool on "layer 1" instead of the black brush. And that same layer can hold the highlights. Although, I would suggest paying attention to shadow areas as there is very little ambient lighting so unless lit by the highlighted areas they will darker thank normal.
Maverick
Offline
Instead of changing to jpg, instead when you open the screen bitmap change the mode to RGB from Index. You can also use the paintbucket tool on "layer 1" instead of the black brush. And that same layer can hold the highlights. Although, I would suggest paying attention to shadow areas as there is very little ambient lighting so unless lit by the highlighted areas they will darker thank normal. -
 Roomie
Offline
Hey man
Roomie
Offline
Hey man
Thats awesome
Thanks for doing all that. I know how much time it can take to write a tutorial.
Takes me back to the days of fantasy photos at Danimation....
Infact that would be an AWESOME concept for a contest here one day
Tags
- No Tags